How to Make Hay
How to Make Hay From Scratch
Hay production is a vital part of our local economy, and if you have land available for growing, cutting, drying, and baling, it’s relatively easy to get started! We sell all of the equipment needed to bale hay, but we’re not just an equipment depot. We’re a community resource, and we’ve laid out everything you need to know about how to make hay bales on your own! Our five-step guide to the hay production process will get you started, and you can always contact us with any questions.
How to Make Hay Bales: Step-By-Step
1. Choosing Your Crop
Hay is a broad term that can cover a wide range of end products. So, if you haven’t yet picked out what you’re going to be growing and cutting, it’s a good idea to take your next steps carefully! Consider your climate and your soil conditions before you get started.
Although brome grass on its own is usually fine for larger livestock, other smaller animals may prefer a mixture of grass and alfalfa or clover. It’s not a bad idea to reach out to local farmers near Flemingsburg and Lexington; they can probably tell you what their animals like to eat.
2. Timing Your Cut
It’s easy to spoil a crop of hay by cutting at the wrong time. Hay that gets too hot or too dry will be lacking in nutrients. On the other hand, hay that is baled while wet can easily mold and spoil. You should plan carefully, and try to cut at the start of a three-day period where your hay will have plenty of time to dry.
3. Choosing the Equipment Needed to Bale Hay
The team at Rose Farm Supply helps local farmers prepare for cutting hay on an almost daily basis, and we know just about everything there is to know about the equipment needed to bale hay. You’ll need a tractor, of course, but you’ll also need the proper attachments:
- Although there are several options that you can consider, many hay-makers near Louisville like to start the process with a rotary cutter or a rotary mower. Drum mowers and disc mowers may also be good options! These tools are great for brush that isn’t too thick.
- Although some may wish to let their hay dry out on its own, using a tedder can accelerate the hay production process. This tool mixes up your hay to help it dry more evenly.
- Last but not least, you’ll also need a hay rake and a baler—either square or round. Pull rakes are usually sufficient, but power rakes may reduce the amount of soil that gets pulled into your final product.
4. The Hay Production Process: Cutting, Drying, and Tedding
Now you’re ready to dive into the hay production process. If you know how to use the tools you’ve purchased, learning how to make hay isn’t all that complex. Once you’ve picked out a good day to start the process, here’s what we recommend:
- Use your rotary cutter to cut down the hay you’d like to bale. Once the hay is cut, it will pass through the cutter’s conditioners. This step breaks down the stems, which allows drying to take place more quickly.
- Allow your hay to dry. Many locals will cut their hay in the morning, allow it to dry all day, and then ted it in the evening. In slightly wetter conditions, you may wish to leave the top layer out all night, and ted in the morning. It’s worth noting that tedding may not be required at all—but it’s never a bad idea to use a tedder, and adding this tool to your lineup is likely to improve your final product.
5. Raking, Baling, and Storing Your Hay
When you’re shopping for the equipment needed to bale hay, remember that you’ll have a choice between powered rakes and pull rakes. The latter are generally lower in cost, and they may require less maintenance, but when they’re not properly tensioned, they may pull excess soil into your final product. Power or rotary rakes can handle a heavier, wetter crop, and they tend to produce better results.
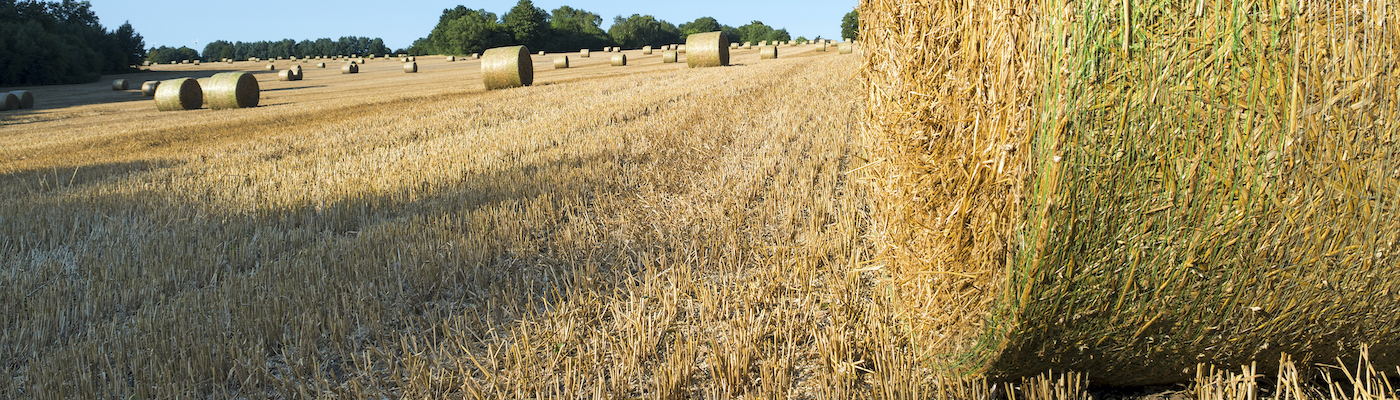
No matter which way you end up going, the raking process will move the hay into position for baling. From there, you can choose to produce either round or square bales:
- Round bales are packed more tightly, and since they tend to shed water, they are less prone to spoilage. If a lot of animals need to get fed, round bales will probably be preferable.
- Square bales are easier to stack and store, but they may not last as long. They may be preferred by those with horses or those with a relatively small number of animals to feed.
In any case, you’ll want to bale up your hay securely and store it indoors if possible! If you do have to store your hay outside, round bales tend to be better at withstanding the elements.
Rose Farm Supply is Here to Help!
Whether you’re learning how to make hay bales for the first time or you’re ready to start an all-new project, you can rely on the team at Rose Farm Supply to help you take the next steps with confidence. Anything is possible when you have the right tool for the job, and you can always find the equipment needed to bale hale in our inventory.