 6147 Morehead Road Flemingsburg, KY 41041
Producing Better Hay Quality
Background
I grew up on a dairy farm in Fleming County, so I understand that when you live on a farm, you often have to do what you have to do to get the job done. We sometimes have to work around weather, equipment, maybe a job or somewhere that sends us a weekly paycheck, so I do understand all of that. As we talk through producing better hay quality, some of the issues that we run into, and some of the things that can get overlooked, I will do my best to keep these things on a practical level.
A little bit about my background, I have a degree in livestock nutrition, so for 25 years I was in the feed industry. I made the change seven years ago to go to a family-owned equipment business. Most of my training comes from the nutrition side, rather than the equipment side of things, so that’s what I am going to try to bring it back to. I’m not here to talk about or push a brand of equipment, but rather some practicality of some different types of equipment that you’re going to encounter on your path to producing better hay quality.
Hay Cutting Methods
Sickle Mowers and Conditioners
Now some of you might have seen someone out using a scythe. Now I will admit that I never have. I have been granted the great pleasure of using a weed hook, but not a scythe. As technology upgraded, we see the sickle mower introduced. Most of you have seen a sickle mower and they are still used today. Most farmers, however, are not putting up hay with them. There’s a lot more trimming done with them. The cutting action that we see with a sickle is a blade on a bar that moves back and forth in a scissoring motion. The trend that we see much more of today is hay being cut with a disc mower; either in a trail-type, pull-type or a mower-conditioner. When we look at the pros and cons of this equipment, a sickle mower or a haybine (the same thing but with a roller conditioner in the back) run at lower speeds, they tend to clog if you do run at higher speeds and they don’t like to cut wet hay.
So that being said, there are some obstacles that you have to work around with how these pieces of equipment operate. My dad is a firm believer in a haybine and he still uses one to this day and that’s great. A positive to this type of equipment is that when you run at lower speeds and hit something, you don’t tear up nearly as much as what you would with a disc mower. When you run slower, you see things a little bit better and that can decrease the amount of damage you would incur. Sickle mowers and haybines also tend to be at a cheaper price point, a little cheaper to operate and have lower repair costs. You just need to understand the equipment, how they operate, what they can handle and match that to your work style.


Disc Mowers & Conditioners
As we move into disc mowers and disc mower conditioners, we go to a different type of cutter bar. Several blades are contained in each of several pods on a disc mower and they run in a rotary fashion. These blades run at very high speeds which allows for them to mow at higher speeds when you go to this type of a cutter bar compared to a sickle mower. They are also much more accommodating in mowing wet hay. However, they are also more susceptible to significant damage. I hear stories multiple times a month once we get into hay season, someone is in a creek bottom mowing and there’s never been anything there before, but a tree stump got washed up or a concrete post suddenly appeared and that disc mower found it and unfortunately are rather unforgiving. Some of the newer models have some things built to the way they’re designed to limit some of the damage and to make it a little more economical to repair, but with the way these types of mowers are designed, more damage will occur when you come into contact with something.
Mower conditioners have largely come to be popular in our part of the world due to dairies and commercial hay operations. What we are attempting to do is to get the hay to dry or cure faster, so that we can get it put up because our weather doesn’t typically leave us large windows to get hay off of the ground. So, let’s discuss a couple of different conditioning systems that we see in mower conditioners.


Benefits of Conditioning Systems
“If you mow with a disc mower, it may take you three days to get it off the ground and with a mower-conditioner, you’ll likely be down to two days and that’s the main difference between the two.”
The first is a roller conditioner. You will mainly see these with a rubber roller; however, some will use a steel roller. Essentially what we are doing here is cutting the hay and pulling it back between these rollers. The way that they are designed is that they will crimp the stem about every four inches. As it crimps the stem, it allows points for the moisture to evaporate from the stem, which dries our hay. These conditioning systems are designed for putting up legume hays (alfalfa, clovers, etc.) where the primary part that we’re after are the leaves. That’s where all the nutrition is stored. So, we want to condition these plants while doing the least amount of damage to the leaves as possible. Normally, we can get one less day drying time by conditioning hay over unconditioned hay. If you mow with a disc mower, it may take you three days to get it off the ground and with a mower-conditioner, you’ll likely be down to two days and that’s the main difference between the two.
Flail Mowers
At the same time, we also see people who are going to flail conditioners. Some brands are pushing this conditioning type more than others, but flails are used to condition grass type hays. Now think back, with legume hays (clover, alfalfa, etc.) where is the nutrition coming from? It’s all in the leaves. In grass however, all of the nutrition is in the stem and the blades. With grass, there is a thin waxy film that covers the plant and flails are designed to scuff the waxy surface to allow points for moisture to leave.
From my personal point of view, I believe that you will see more leaf damage in legume type hay from flail conditioners than what you would see with a roller conditioning system. If you’re only putting up grass hay, then a flail conditioner would fit your needs just fine. The problem is how many people are putting up only grass hay? We see a lot of clover in pasture fields that just naturally grows there that will end up in your hay cuttings. So, don’t overlook some of the things that you have growing in your fields even though you might not think it’s significant. They still are adding nutritional value to your hay.

When we’re talking about hay quality, I think this is a good place to start. I have individuals who will come into the dealership all the time and want to know the differences in the different types of equipment, so this gives a good understanding and jumping off place as we talk about some of the methods that we can use to put up better quality hay whether we are selling it or feeding it our own livestock.
Agronomy Basics
Let’s talk about reducing some losses when we’re putting up hay. The first place I want to start with is talking about metabolic losses. Now I understand that’s a big confusing word, but all that means is that because we just simply go out and cut hay, does that mean all cellular activity stops in that hay? It doesn’t. The cells continue to live for a period of time, but as it does, it’s burning energy the entire time. Energy that you would like to have going into your dairy cow, your beef cow, horse, or whatever else you’re feeding that forage to. The longer that we allow hay to stay above 40% moisture once it has been cut, that cellular activity is going to continue respiration, which is burning up calories. The same calories that will not be available for your livestock. Our main goal is to get hay below 40% moisture as soon as we can or to go ahead and package it as high moisture hay. Now what I’m mainly talking about refers to putting up dry hay because that’s the most common in eastern Kentucky and what we typically see.
“There are two main things that drive cure time in hay, Sunlight and Air.”
So, the question is how do we get hay below 40% moisture? There are two main things that drive cure time in hay, Sunlight and Air. The more sunlight and air that we can get on the hay, the faster that we can get it to dry and get the moisture out of it which will allow for the cellular respiration in the hay to stop. One good practice for producing better hay quality, is to cut your hay earlier in the day rather than at let’s say, six o’clock at night. If we cut hay at one in the afternoon versus six at night, are we going to get more sunlight and more air on the hay? Yes. The quicker we can get the hay below 40% moisture, the quicker we stop respiration in the plant and the more nutrition that will be left in the hay. Now again I will say I understand the practicality of farming. If you work until five or six at night, then I know you’re probably not going to get to cut hay at one. So again, I understand this, I’m just looking at some of the best practices we can use for butting up higher quality hay.
The other thing that we need to be aware of is weathering losses. Rainfall on cut hay prolongs respiration in the plant. I’ve heard people say, “It’s going to get wet whether it’s standing or if I cut it. It’s been raining for the last two weeks and I’ve got to get some hay on the ground”, and I’m sure you’ve heard very similar things to that if not just like that. I completely understand that, but whenever we mow hay and it turns around and starts to rain on it, we are putting less sunlight on it and keeping the moisture in it which is lowering the quality of hay the whole time. But on the other side, if you leave it standing, the quality of hay is going to go backwards on you as well. We also see that some of the soluble nutrients will leach out when you have hay down and it keeps raining on it. So, we really don’t like to keep hay down and wet. We want to get it up as quickly as we can.
Patience Will Produce Better Quality Hay

“We get caught thinking that we are supposed to always be doing something to it. That is where we end up with some mechanical losses to our hay.”
We look at some of the mechanical losses of when we have hay down, moisture is the greatest factor that leads to leaf loss. But you can also get hay that’s too dry, which usually tends to be on the first cutting of hay. Everyone starts getting anxious around Memorial Day. The mentality of, “It doesn’t matter if anything else is ready to start, but I’m ready to go” starts to develop for farmers around this time. So, we get the hay cut one day and then the next day, or sometimes the same day, we go ted it. And then the next day we’re going to go ted it again. And the next, I’m going to rake it. We get caught thinking that we are supposed to always be doing something to it. That is where we end up with some mechanical losses to our hay. Whenever we rake hay, we only want to rake it once.
Taking a moment to look at the evolution of conditioning hay, many of the older styles of conditioners put the hay into a sort of windrow. The move today, however, is to get that hay as spread out as possible coming out of the roller conditioners. What does that do for us? When it’s spread out, more sunlight is hitting that hay and more air is on it, so by this time you know that means for a faster drying period. So, because of this, most of the newer models of mower-conditioners will allow us to go 90% of the cutting width so that hay gets spread out to cover the most area. So, do we need to ted hay that’s been through a mower-conditioner? Probably not. When we cut with disc mowers or sickle mowers, that is where tenders have a place in our operation. We cut with these pieces of equipment, we haven’t done anything to increase or enhance the dry time mechanically. We haven’t crimped it or scuffed it, so tedding it is then the step to get some air under it.
When we talk about baling, square baling is usually going to cost you 2-5% leaf loss whereas round balers are 1% or less. If you look at the action on a square bale, there is more mechanical contact with the hay which will cause for a little more loss than with a round baler. But at the same time, you will make up for it in storage loss because where square bales are kept inside, you’re not going to have the loss that round bales will incur.
These concepts are some of the bigger things to keep in mind. I know it’s not easy. growing up we were cutting hay at nine o’clock at night and that’s when you had to get it done. If we can get the sunlight on the hay as soon as we can when we’re mowing it, you will certainly increase the quality of the hay that you’re putting up.
How You Cut Hay Matters
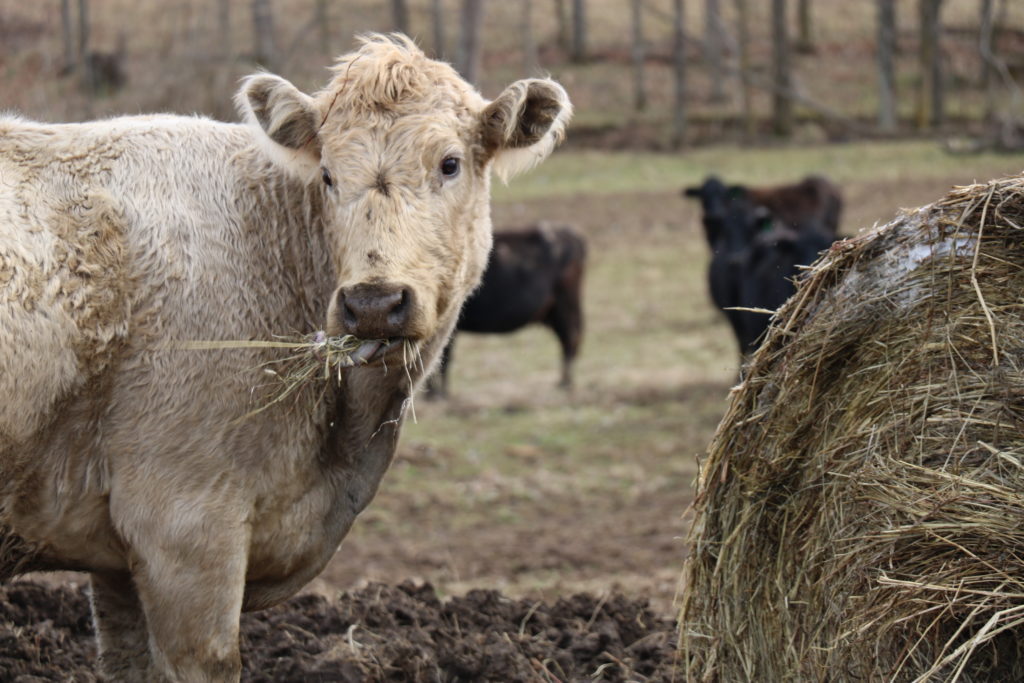
Another way that we can produce better quality hay is to leave a little stubble. One of the things that I see a lot on the equipment side, when I’m out delivering a rake for instance, is when I’m in the field where they have the hay cut and I can kick up dirt about anywhere I want to. That hay has been cut so short and they haven’t left any stubble there. I bring this up because there are a few advantages to leaving some stubble when you’re cutting. Your natural inclination might be to put up as much hay as you can, and I get that. However, the least nutritious part of the plant is in the stem at the bottom. The weedy or leafy part of the plant grows out of that tough stem bottom as it matures and that’s what we’re after. Cows don’t like the tough stem bottom, nutritionally it’s not very good and when you leave that part of the plant, what you will find is that it will grow back much faster.


When you leave stubble, there are also several advantages. First, it allows for better air flow. When you cut your hay, it won’t be lying flat on the ground on dirt. The stubble holds it up and allows air to circulate underneath it which will help it to cure faster. Second, it reduces the wear on machinery. If you are using a disc mower, drum mower, or any other cutting machine, when you put those blades down on the ground, it’s very good for our parts business. We will sell you as many blades as you want to buy, but that’s the damage that can occur by running your blades into the ground.
“If you put up 500 bales, the amount of hay you would lose by not cutting at the ground and leaving 3”-4” wouldn’t add up to 2 bales.”
You might say, “Well that’s where I need to cut if I want to get the most hay possible”, but I suggest leaving 3”-4” of stubble. If I see someone mowing hay and there is a dust cloud behind them, they’re probably a little too close to the ground. Everyone is not guilty of this, but I do see it quite often. If you leave a little stubble, it’s easier on your machinery, not just what you mow with, but on a rake, tedder and your baler because you reduce wear and tear on your cutting blades, rake and tedder teeth, and baler tines. When you mow at ground level, you’re getting the least nutritious part of the plant. If you put up 500 bales, the amount of hay you would lose by not cutting at the ground and leaving 3”-4” wouldn’t add up to 2 bales. So, when you put it in that perspective, is 2 bales with little nutrition worth the equipment and maintenance costs associated with cutting that hay?
The stubble that you leave is what you want your hay to grown back in. After you get your hay put up, no one wants to look at the ground and not be able to see anything grow for two weeks. You want to give the plant the best scenario to grow back to where it’s pushing you to get the previous hay off the field because it’s already starting to grow back. This should also lead to producing better quality hay because the plant is regrowing from a more mature state.
Some of the push back that I might get from this would be that it’s not as easy to mow when you’re not mowing against the ground. Because if I am mowing against the ground, does the plant stand there better for you? Yes, it does. If I am trying to mow it three inched higher, the hay will want to blow over a little more, but there are some things you can do to alleviate that. We see this more in mower-conditioners, but you can decrease your PTO speed and increase your ground speed and it will stand up better of you. When those blades spin, there is turbulence created and it wants to blow the hay. When you slow down your PTO speed down, you’re lessening the turbulence, and by speeding up the ground speed, you’re attacking the hay more quickly which lessens the opportunity for the hay to blow over. Late season hay is when this issue might arise; not the first cutting.
Animal Nutrition
I shared with you earlier, that my background had been in livestock nutrition and I think that the connection between putting up quality hay and fulfilling the nutrition requirements for our livestock is absolutely essential for us all to understand. Why are you raising hay? Are you going to try to sell it? Are you going to feed it? In our part of Kentucky, we are going to see hay being fed to mostly beef cattle, so these are some important and easy numbers for you to remember.
For a dry, pregnant brood cow, which we all probably have, they need 10 pounds of Total Digestible Nutrients (TDN) per day. That’s the term we use when we talk about energy values in forages. She needs 2 pounds of crude protein. So, let’s say she’s pregnant and it’s November and she’s in her second trimester of pregnancy, I would tell you that she does not have great nutritional needs. Most of the calf is developed in the last trimester, so what we’re looking at is what she needs on a daily basis just to take care of her as a dry cow.
So, she needs 10 pounds of TDN and 2 pounds of crude protein. Now let’s jump to March and she’s calving. She’s going to start milk production and she will peak in milk production six weeks from the time she has the baby calf. Whenever she peaks in milk production, her nutrition requirements go from 10 pounds to roughly 12 pounds. So, she needs two more pounds of energy and an additional pound of protein on a daily basis. Her requirements are that much higher now, so the question you have to ask yourself is where is that going to come from? You were feeding her hay in November and now in March you’re feeding her hay and there’s a little green stuff in the pasture fields that doesn’t have much nutrition, so where is it going to come from? If she doesn’t get it, she will start dropping body weight; that’s where the energy will come from. Protein is a little tougher because she can’t produce protein.
The first sign that you will find that her nutrition is deficient is when you want her to calve again. When would you like her to rebreed after she calves? May if you want her to have another calf this time of year, next year. Ten months is about how long it’s going to take for you to get another calf (about 280 days). So, if you short-change her on energy, she will start milking body weight off. A cows one priority is to take care of herself; she is going to breathe, maintain body temperature, etc. She is going to take care of herself first before her body produces anything for anyone else.
“A cow will cheat herself for a little while, but if you don’t get her enough energy, she will not rebreed.”
Second, if she has enough energy requirements to take care of herself, then she will move on to milk production and taking care of her calf. Finally, if she meets both of those other requirements, she will breed back. That’s the last thing on her list of priorities. A cow will cheat herself for a little while, but if you don’t get her enough energy, she will not rebreed. Rebreeding is a luxury for her. If you feed her, she will rebreed; if you do not, she will not. How do you make money in the beef industry? It’s all through calves. So, you have to manage how you fulfill the nutrition requirements from 10 pounds to 12 pounds of TDN and 2 pounds to 3 pounds of protein.
The difficult part that we often find is that we don’t know we are with our forages. Will our forage fulfill these requirements for us? It certainly can. Good quality forage can provide the level of nutrition that the cow needs during pregnancy. Or it can also be the case that you hear about cows starving off of full feed. So, where are you?
Summary
There are a lot of smaller things you can do that all add up, to produce better quality hay. But the first thing you need to establish for yourself is what are your goals? Are you trying to sustain your livestock off of your forage year-round? Understanding your goal will help you to move forward in making adjustments in your methods or equipment to produce better quality hay. In the end, it’s all a cost-benefit analysis you have to make for yourself. Spending a little more time investing in hay quality, can save you money with external feed and supplements. You’ll also have peace of mind knowing that your livestock are properly nourished and will continue to produce for you at peak performance for years to come.
Commonly Asked Questions
Do you lose any protein when you’re crimping the stem every 4 inches?
As long as you are just crimping and not cutting the stem, you’re not really doing any damage to the plant. You’re just creating points for the moisture to evaporate. However, if you’re running alfalfa through a flail conditioner and it’s beating the leaves harshly and knocking some of the leaves off, then you will absolutely be losing protein because you’re losing your nutrition source.
Are rotary rakes the best option when it comes to lagoon types of hay?
There are 3 types of rakes: bar rakes, wheel rakes and rotary rakes. Bar rakes have been extremely popular over the last 50 years. Wheel rakes were popular before the bar rake but are now making a comeback again on the market. And then you have a rotary rake. It acts like a pitchfork as it turns, it picks, up the hay and throws in into a curtain. This is the gentlest type of rake. If you are heavy with alfalfa or clover, this is the best rake option for you without a doubt. These rakes were designed for high quality forage and that is why they work so well with all types of hay, but particularly with legume types of hay.
